Change git init starting branch name from master to main in macOS Terminal
Permanently change master to main on your local git

Why?
In October 2020, GitHub announced that it had permanently set the default branch name to main instead of master. New repositories would see their first branch named "main."
Bitbucket and GitLab have adopted the change too.
Xcode made the change as well in version 12. If you check the box for "Create git repository on my Mac," you'll see it in "main" branch.
But macOS Terminal
If you use a Mac running Big Sur or older (version 10 or 11), and you run git init, your default branch will be named master.
This is regrettably unchangeable. Why?
You need to be running git version 2.28.0 or higher in order to change the starting branch's name. The git that Apple shipped with Big Sur is version 2.24.3.
You can confirm this by running:
git --version
Renaming your existing repositories
If you have an existing repo whose default branch you'd like to rename, you can pause right here and just follow this very helpful blog at GitTower.
When you're ready to change the default branch name for new repos on your local machine, continue reading!
Where to get a newer git
Ahh, good ole homebrew! We'll use homebrew to install the latest version of git.
I've opted not to replace Apple's git with Homebrew's git. This is nice because, if you don't like the Homebrew's git for whatever reason sometime in the future, you can always revert back to Apple's git by running brew remove git. You'll back in Kansas with Toto.
Start with Homebrew
If you're not sure whether you have Homebrew or not, run the following command in Terminal:
brew doctor
If you see "Your system is ready to brew," then carry on to the next section!
If you don't see "Your system is ready to brew," here are some trusty links depending on what situation you're in. Come back after your system is ready to brew.
Honestly, this is the hardest part of the whole exercise. Homebrew errors really bum me out, but if you google the errors coming out of brew doctor, you should be able to get it up and running.
- Homebrew Explained: Tutsplus
- Install Homebrew: Official Homebrew website
- Homebrew Cheatsheet: code2bits blog
Brew a newer git
1. Install the latest version of git on your Mac.
brew install git
2. Once git is installed, confirm that you're running Homebrew's version of git.
which git
If you see "/usr/local/bin/git", good job! Move on to step 3.
If you see "/usr/bin," then you need to to add the path to the Homebrew's git to your own path:
export PATH=/usr/local/bin:$PATH
Don't continue until you see "/usr/local/bin" as the response to which git.
3. Confirm that this version is new enough. We want 2.28.0 or later.
git --version
Change the default branch name
git config --global init.defaultBranch main
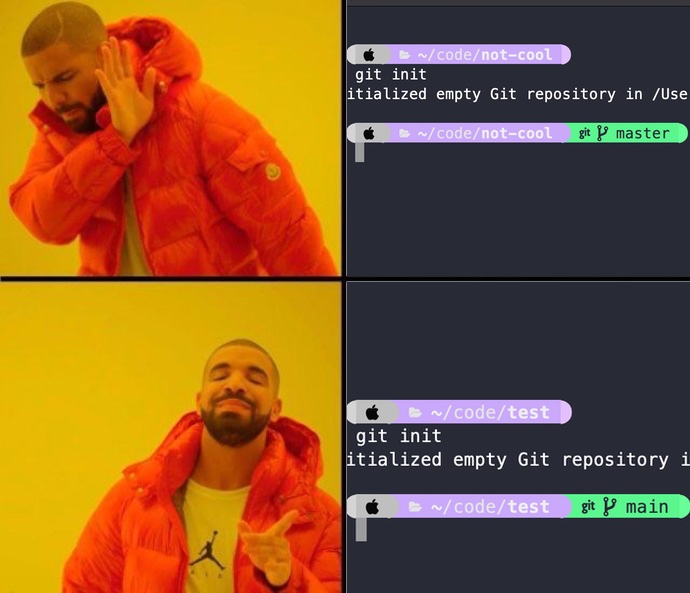
Test it out by creating a new folder called test and then initialize git
mkdir test
cd test
git init
If your branch is named "main", you're done!
High five! 🙌
Questions?
Feel free to tweet me @theevo if you have questions or suggestions!


